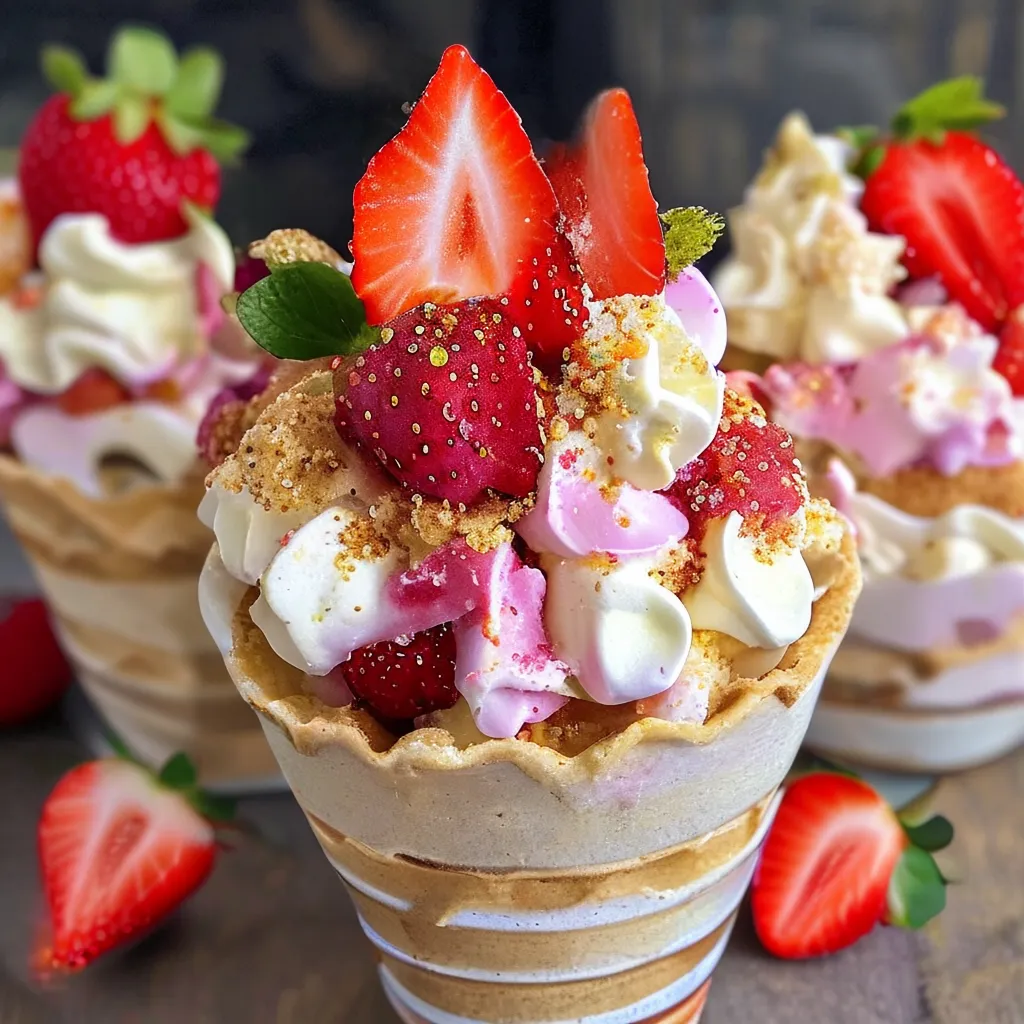
Desserts are a great way to wrap up any meal, but sometimes, you want something that’s both indulgent and refreshing. Strawberry Crunch Cheesecake Cones give you the best of both worlds. These no-bake, easy-to-make cones combine the rich, creamy texture of cheesecake with a crunchy, sweet topping, all served in a convenient cone for easy eating. Whether you’re preparing for a summer treat, a party, or simply want something delicious to snack on, these cheesecake cones are sure to impress anyone who loves strawberries and cheesecake.
Why You’ll Love Strawberry Crunch Cheesecake Cones
Perfectly Balanced Flavors
What makes Strawberry Crunch Cheesecake Cones truly irresistible is the harmony of flavors. The cheesecake filling is rich and tangy with a subtle sweetness, while the crunchy topping brings texture and a touch of vanilla. Topped off with a fresh strawberry, each bite delivers the perfect blend of creamy, crunchy, and fruity goodness. The contrast in textures and flavors makes these cones hard to resist, and you’ll find yourself reaching for more.
Easy to Make, Fun to Eat
If you’re someone who shies away from complicated desserts, these cones are exactly what you need. There’s no baking required, making the process quick and straightforward. They’re also easy to customize, so whether you’re preparing for a casual get-together or a more formal event, these cheesecake cones will make the dessert process fun and simple.
Ingredients for Strawberry Crunch Cheesecake Cones
To create these scrumptious cheesecake cones, you’ll need a few simple ingredients. Here’s everything you need to prepare both the cheesecake filling and the crunchy topping:
For the Cheesecake Filling:
- 8 oz (225g) cream cheese, softened
- 1/2 cup (120g) powdered sugar
- 1 tsp vanilla extract
- 1 cup (240ml) heavy whipping cream
- 1 tbsp lemon juice
- 1/2 tsp lemon zest (optional)
For the Crunchy Topping:
- 1 cup (100g) crushed graham crackers
- 1/2 cup (50g) shredded coconut
- 1/2 cup (75g) butter, melted
- 1/4 cup (50g) granulated sugar
- 1/4 tsp vanilla extract
Essential Tools for the Recipe
Before you begin, gather these essential tools to help make the process easier:
- Mixing bowls
- Hand mixer or stand mixer
- Whisk
- Muffin tin or small bowls (for shaping the cones)
- Piping bag or zip-lock bag (optional, for filling the cones neatly)
- Spoon or spatula
Step-by-Step Instructions
Now let’s walk through how to assemble these delicious cones. With each step, you’ll see how easy it is to create this no-bake dessert.
Step 1: Prepare the Cheesecake Filling
- Start by beating the softened cream cheese and powdered sugar in a mixing bowl until smooth. This ensures that there are no lumps in your filling.
- Add the vanilla extract, lemon juice, and lemon zest (if you’re using it) and mix until everything is well combined.
- In a separate bowl, whip the heavy whipping cream until stiff peaks form.
- Gently fold the whipped cream into the cream cheese mixture until fully incorporated. This step is key to achieving that light, airy texture in the filling.
- Set the cheesecake filling aside in the fridge to chill while you work on the topping.
Step 2: Prepare the Crunchy Topping
- In a medium bowl, combine the crushed graham crackers, shredded coconut, melted butter, granulated sugar, and vanilla extract.
- Stir the ingredients together until everything is evenly mixed and the texture becomes crumbly.
- Set the crunchy topping aside for assembly.
Step 3: Assemble the Cheesecake Cones
- Carefully fill each cone with the cheesecake filling. You can use a piping bag or a zip-lock bag to make this step neater and more precise.
- After filling the cones, sprinkle the crunchy graham cracker topping generously on top. This adds the perfect finishing touch to each cone.
- Finally, garnish with fresh strawberry slices for a burst of fruity freshness.
- Serve immediately, or place the cones in the fridge for about 30 minutes to set the filling before serving.
Tips for the Perfect Strawberry Crunch Cheesecake Cones
Use Room Temperature Cream Cheese
To prevent any lumps in your cheesecake filling, always ensure that your cream cheese is at room temperature. Cold cream cheese can be difficult to mix and may result in a lumpy filling.
Be Creative with Your Toppings
While this recipe uses a graham cracker topping, feel free to get creative. You could add crushed pretzels for an extra salty crunch, or drizzle chocolate syrup over the top for a chocolatey twist. The possibilities are endless!
Substitutions and Variations
Add Other Fruits
Strawberries are the star of this recipe, but you can easily swap them out for other fruits. Raspberries, blueberries, or even peaches would make great alternatives. Just slice the fruit to fit and place it on top of your cones for a colorful and tasty variation.
Make It Gluten-Free
If you or your guests need to avoid gluten, simply substitute the graham crackers with gluten-free alternatives. Many brands offer gluten-free graham crackers, or you can make your own. This way, everyone can enjoy this delicious dessert without worrying about gluten.
How to Store and Serve
- Storage: These cheesecake cones are best served fresh, but if you have leftovers, you can store them in an airtight container in the fridge for up to two days.
- Serving: Allow the cones to chill in the fridge for 20-30 minutes before serving to give the filling time to set. This also allows the flavors to meld together for the best taste.
Common Mistakes to Avoid
- Overmixing the Cream Cheese: Overbeating the cream cheese can make the filling too thick and dense. Mix only until smooth and combined.
- Using Cold Cream Cheese: Cold cream cheese can cause lumps in the filling, so always let it come to room temperature before mixing.
- Too Much Topping: While the crunchy topping is delicious, using too much can overpower the light and creamy cheesecake filling. Sprinkle it lightly for the best balance.
Conclusion
Strawberry Crunch Cheesecake Cones are a delightful, easy-to-make dessert that everyone will love. Whether you’re hosting a party, looking for a fun family treat, or simply craving something sweet, these cones deliver the perfect combination of creamy cheesecake, crunchy topping, and fresh fruit. Best of all, they’re no-bake, making them a hassle-free dessert to prepare.
FAQs
Can I use store-bought cones for this recipe?
Yes! You can use pre-made cones, whether they’re sugar cones or waffle cones. The homemade filling and topping will make them taste even better.
Can I prepare the cheesecake filling ahead of time?
Absolutely! You can make the cheesecake filling a day ahead and store it in the fridge. Just fill the cones when you’re ready to serve.
Can I substitute whipped topping for heavy cream?
Yes, you can use whipped topping instead of heavy cream. However, keep in mind that whipped topping will give you a slightly lighter filling, but it will still work well.
Can I freeze these cheesecake cones?
Freezing is not recommended for the full cones, as the texture of the filling may change. However, you can freeze the components separately and assemble the cones when you’re ready to serve.
Can I add chocolate to the cheesecake filling?
Of course! For a chocolate twist, simply fold in some melted chocolate into the cheesecake filling. It will add richness and a deep chocolate flavor to the dessert.